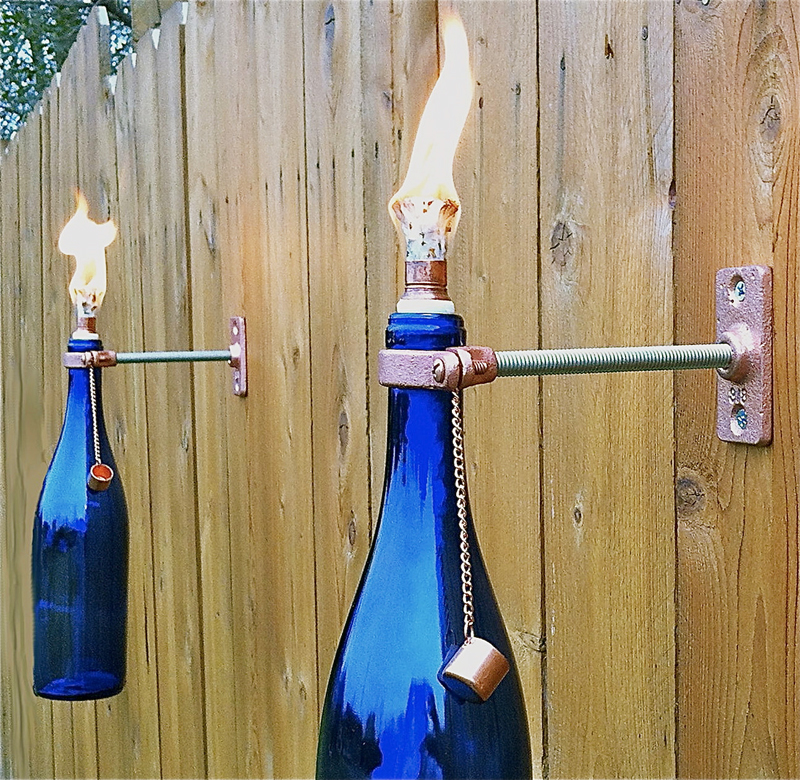
Make good use of those old wine bottles and create your own tiki torches at home!

Materials:
- Empty Wine Bottle (or any beautiful glass bottles which have necks 1 inch in diameter)
- Teflon Tape 1/2 inch
- Copper Top Plate Connector (threaded for 3/8”-16 thread rod)
- 1” Split Ring Hanger (threaded for 3/8”-16 thread rod)
- 1/2” x 3/8” Copper Coupling
- 1/2” Copper Cap
- Two Hex Nuts (threaded for 3/8”-16 thread rod)
- Two #10 x 1” Zinc Plated Wood Screws (if you’re mounting it to wood)
- 3/8”-16 Zinc Plated Threaded Rod
- Tiki Replacement Wick
- Torch Fuel (use ONLY fuel made specifically for outdoor torches to be safe. i.e. Tiki brand)
Steps:
Decide where you want to put your tiki torch. Screw the Top Plate connector in place.
Screw in the 3/8”-16 Rod on the mounted plate until it stops.
Thread the two Hex Nuts on to the Rod and tighten one all the way down at the point where the Rod meets the Top Connector Plate. Leave the other Hex Nut at the front end so it can be used to secure the Split Ring Hanger.
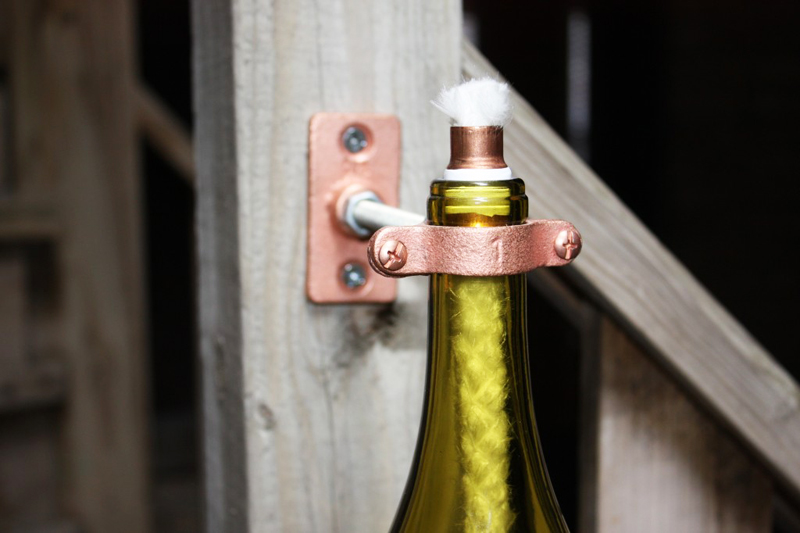
Thread on the Split Ring Hanger just enough so that the Rod is flush with the inside of the ring. Turn the 2nd Hex Nut counter-clockwise to snug it up against the Split Ring Hanger.

Carefully and tightly wrap the 1/2-inch end of the Coupling with your Teflon Tape. Wrap it nice and clean for an even surface. Build up the tape until it fits well in the opening of the bottle and you are sure that it wont fall inside.
Insert the Wick in the Coupling until it sticks out about 1/4-inch or less. The Tiki brand replacement wicks are about 3/8-inch in diameter so they fit really well.

Use a funnel to fill the bottle with your favorite torch oil.
Insert the Coupling & Wick in the top of the bottle and twist it into place. Let the Wick absorb oil.
Loosen up the Split Ring Hanger on one side and position the bottle neck in the ring.
Flip the front half of the ring back into place and tighten down the Hanger evenly on both sides. You may need to loosen the other side to make sure both sides are an even tightness. Do not over tighten the Hanger.

You can simply blow out fire if you want to stop using it. Use the Copper Cap to keep the Wick dry when not in use.
Source: Gerardot And Co.